HORI Fighting Stick Alpha - Extended Vewlix Layout PLEXI TOP and BOTTOM Panel KIT
EXTENDED VEWLIX LAYOUT
What's the purpose?
The original Vewlix button layout was created by Taito when they released the Vewlix arcade cabinets. This layout was adopted and accepted by many arcade stick manufacturers over time and was used in Hori's home version of their RAP PRO Vewlix arcade stick. The issue that some players had with this was the spacing in between the joystick and the first set of buttons, which was a bit close, especially for those who had larger hands. In 2012, we met with Hori to discuss some improvements to their first RAP PRO Vewlix arcade stick and suggested to provide more space in between the buttons and joystick. They later released the RAP Kai units, which was primarily made for the North American market and later widely accepted.
So today, for some arcade sticks that aren't available in the Vewlix format, we decided to go our own route and release the Extended Vewlix Layout. This kit specifically contains the top plexi (to make your own custom artwork) and the bottom support panel
Dual Layer
Where applicable, we will use two layers of panels (a bottom and a top) as mentioned above to preserve the stock dimensions. This is important if you want to keep the original height of the joystick as well as provide more support for the buttons and joystick (less vibration). Up to this point, the steel panels consist of only one layer, which would include the joystick mount, leaving some dimples behind for where the joystick plate is mounted
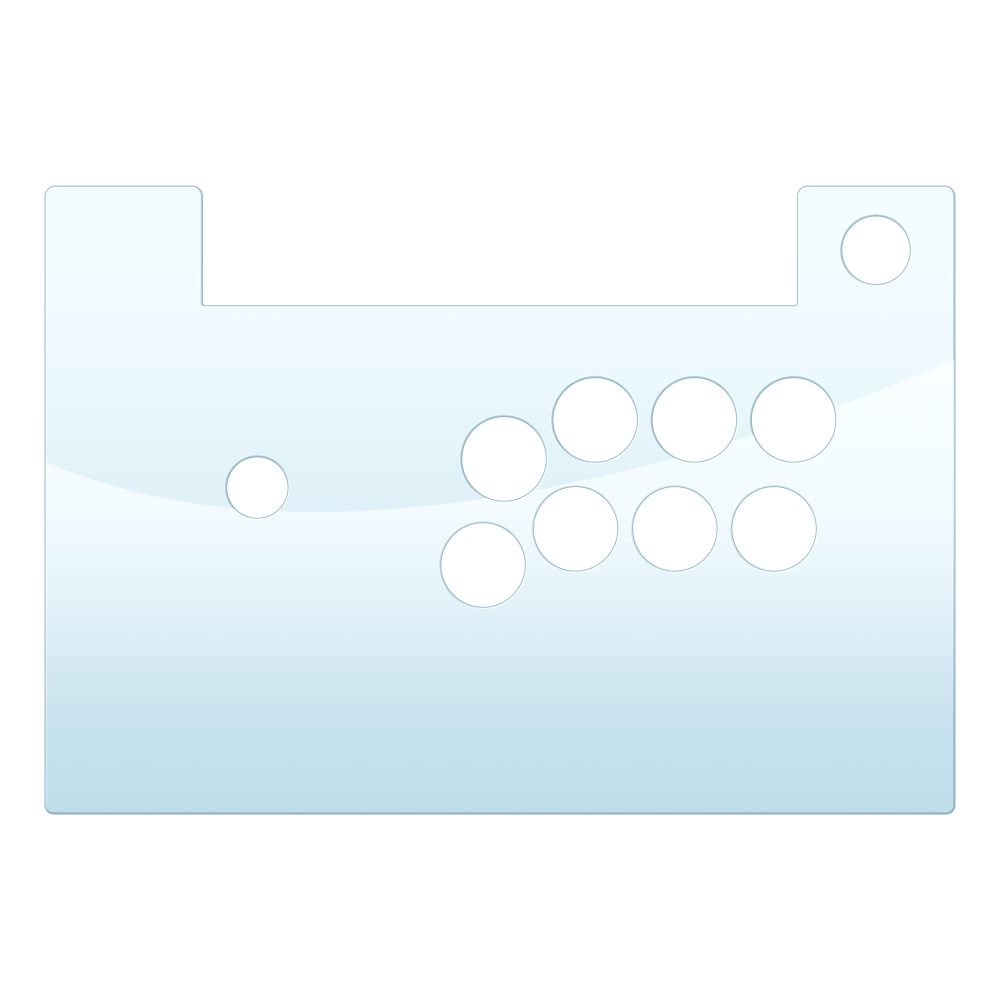
Extended Vewlix Button Layout
Based off of the original Vewlix button layout, the revised extended layout which was initially suggested by us for Hori's RAP series arcade sticks in their "Kai" models provides more spacing between the joystick and the pushbuttons
Installation is easy: The Hori Fighting Stick Alpha PS5 or Xbox X variants were both created with easy modding in mind. With the pop open clamshell design, simply remove 6 screws from underneath the lid (there are arrows that point to them for ease of identification). You will then unmount the joystick and remove the buttons. At the top of the control panel, there is a indentation where you can place your nail below to remove the clear plexi. Remove this piece and the bottom support panel below it (a few more screws) and replace with the new bottom support and top Extended Vewlix panel
Kit Contents
- Top Clear Plexi
- Bottom Matching Metal Support Panel
Quick Link: https://tinyurl.com/HORIFSAPLEXIKITEXTVEW